
Install and Configure Nginx on Arch Manjaro
Install and Configure Nginx on Arch Manjaro
Arch Manjaro gives you full control over what is installed, this also means that anything that get's installed is minimalistic.
If you install nginx you will be greated with a minimal install.


When i was first reading up on Nginx, i got confused because allot of guides don't explain how or why.
On Arch Manjaro no default folders are made, so we have all the freedom to make it easy for us.

Before we start, some tips:
To make config's for your domain or to learn in general how Nginx works i can recommend:
https://nginxconfig.io/Tip: The public free ports are 49152-65535
Install Nginx
Make sure you have PHP installed and setup. If not follow the instructions here: Instal LEMP(P) Stack

Install Nginx, Certbot and the certbot plugin for Nginx
nginx.org recommends using the mainline version.
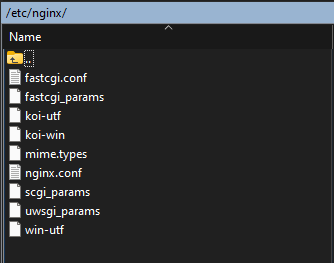
sudo pacman -S nginx-mainline certbot certbot-nginxLike i said before you will be greated with a minimalistic install of Nginx. On other distributions you get the standard folders pre-made for you.
Enable Nginx to auto start at boot and start it now
sudo systemctl enable --now nginxNginx.conf
Like i said in my other blog post (Install LEMP(P) Stack), this is NOT how you should use Nginx.

I was talking about nginx.conf.

Let's open nginx.conf:
sudo nano /etc/nginx.confAnd let's change it from this:
user http;
worker_processes  1;

#error_log  logs/error.log;
#error_log  logs/error.log  notice;
#error_log  logs/error.log  info;

#pid        logs/nginx.pid;


events {
    worker_connections  1024;
}


http {
    include       mime.types;
    default_type  application/octet-stream;

    #log_format  main  '$remote_addr - $remote_user [$time_local] "$request" '
    #                  '$status $body_bytes_sent "$http_referer" '
    #                  '"$http_user_agent" "$http_x_forwarded_for"';

    #access_log  logs/access.log  main;

    sendfile        on;
    #tcp_nopush     on;

    #keepalive_timeout  0;
    keepalive_timeout  65;

    #gzip  on;

    server {
        listen       80;
        server_name  localhost;

        #charset koi8-r;

        #access_log  logs/host.access.log  main;

        location / {
            root   /usr/share/nginx/html;
            index  index.html index.htm;
        }

        #error_page  404              /404.html;

        # redirect server error pages to the static page /50x.html
        #
        error_page   500 502 503 504  /50x.html;
        location = /50x.html {
            root   /usr/share/nginx/html;
        }

        # proxy the PHP scripts to Apache listening on 127.0.0.1:80
        #
        #location ~ \.php$ {
        #    proxy_pass   http://127.0.0.1;
        #}

        # pass the PHP scripts to FastCGI server listening on 127.0.0.1:9000
        #
        #location ~ \.php$ {
        #    root           html;
        #    fastcgi_pass   127.0.0.1:9000;
        #    fastcgi_index  index.php;
        #    fastcgi_param  SCRIPT_FILENAME  /scripts$fastcgi_script_name;
        #    include        fastcgi_params;
        #}

        # deny access to .htaccess files, if Apache's document root
        # concurs with nginx's one
        #
        #location ~ /\.ht {
        #    deny  all;
        #}

	# pass the PHP scripts to FPM Unix socket running on unix:/run/php-fpm7/php-fpm.sock
	# Change php-fpm7 to php-fpm for php8
	location ~ \.php$ {
	root           /usr/share/nginx/html;
    	fastcgi_pass   unix:/run/php-fpm7/php-fpm.sock;
    	fastcgi_index  index.php;
	fastcgi_param  SCRIPT_FILENAME $document_root$fastcgi_script_name;
	include		   fastcgi_params;
	}

    }

# phpMyAdmin - Control Panel

server {
        listen                                  81;
        listen                                  [::]:81;
        server_name                             phpmyadmin;
        root                                    /usr/share/webapps/phpMyAdmin;
        index                                   index.php;

        location / {
        try_files                               $uri $uri/ /index.php;
        }

        location ~ \.php$ {
        fastcgi_pass                            unix:/run/php-fpm7/php-fpm.sock;
        fastcgi_param                           SCRIPT_FILENAME $document_root$fastcgi_script_name;
        include                                 fastcgi_params;
        }
}

    # another virtual host using mix of IP-, name-, and port-based configuration
    #
    #server {
    #    listen       8000;
    #    listen       somename:8080;
    #    server_name  somename  alias  another.alias;

    #    location / {
    #        root   html;
    #        index  index.html index.htm;
    #    }
    #}


    # HTTPS server
    #
    #server {
    #    listen       443 ssl;
    #    server_name  localhost;

    #    ssl_certificate      cert.pem;
    #    ssl_certificate_key  cert.key;

    #    ssl_session_cache    shared:SSL:1m;
    #    ssl_session_timeout  5m;

    #    ssl_ciphers  HIGH:!aNULL:!MD5;
    #    ssl_prefer_server_ciphers  on;

    #    location / {
    #        root   html;
    #        index  index.html index.htm;
    #    }
    #}

}
Into this:
user                 		http;
worker_processes     		auto;
worker_rlimit_nofile 		65535;

# Load modules
include              		/etc/nginx/modules-enabled/*.conf;

events {
    multi_accept       		on;
    worker_connections 		65535;
}

http {
    charset                	utf-8;
    sendfile               	on;
    tcp_nopush             	on;
    tcp_nodelay            	on;
    server_tokens          	off;
    log_not_found          	off;
    types_hash_max_size    	2048;
    types_hash_bucket_size 	512;
    client_max_body_size   	512M;

    # MIME
    include                	mime.types;
    default_type           	application/octet-stream;

    # Logging
    access_log             /var/log/nginx/access.log;
    error_log              /var/log/nginx/error.log warn;

    # SSL
    ssl_session_timeout    	1d;
    ssl_session_cache      	shared:SSL:10m;
    ssl_session_tickets    	off;

    # Diffie-Hellman parameter for DHE ciphersuites
    ssl_dhparam            	/etc/nginx/dhparam.pem;

    # Mozilla Intermediate configuration
    ssl_protocols          	TLSv1.2 TLSv1.3;
    ssl_ciphers            	ECDHE-ECDSA-AES128-GCM-SHA256:ECDHE-RSA-AES128-GCM-SHA256:ECDHE-ECDSA-AES256-GCM-SHA384:ECDHE-RSA-AES256-GCM-SHA384:ECDHE-ECDSA-CHACHA20-POLY1305:ECDHE-RSA-CHACHA20-POLY1305:DHE-RSA-AES128-GCM-SHA256:DHE-RSA-AES256-GCM-SHA384;

    # OCSP Stapling
    ssl_stapling           	on;
    ssl_stapling_verify    	on;
    resolver               	1.1.1.1 1.0.0.1 8.8.8.8 8.8.4.4 208.67.222.222 208.67.220.220 valid=60s;
    resolver_timeout       	2s;

    # Connection header for WebSocket reverse proxy
    map $http_upgrade $connection_upgrade {
        default upgrade;
        ""      close;
    }


    # Load configs
    include 			/etc/nginx/conf.d/*.conf;
    include 			/etc/nginx/sites-enabled/*;
}
As you can see this is much more readable and just contains configurations, no websites or shit. This can be used on Arch and/ or Manjaro. (https://nginxconfig.io/) On Arch Manjaro Nginx runs as user: http and group: http. To finish the base setup we also have to generate a diffie-hellman key and create an ACME-challenge directory (for Let's Encrypt). Generate a Diffie-Hellman key:
sudo openssl dhparam -out /etc/nginx/dhparam.pem 2048Create an ACME-challenge directory (for Let's Encrypt):
sudo mkdir -p /var/lib/letsencrypt/.well-known
sudo chgrp http /var/lib/letsencrypt
sudo chmod g+s /var/lib/letsencrypt
This is the base setup, where you can work from: - Nginx.conf is setup and you wil probably never touch it again. - Dhparam.pem is generated (SSL) - ACME folder is there for Let's Encrypt (SSL)
Setup Files and Folders for Nginx
Example:
On Debian the standard install contains the following folders and files:
- conf.d --> File: default.conf
- modules-available
- modules-enabled
- sites-available --> file: default
- sites-enabled
- snippets  --> fastcgi-php.conf and snakeoil.conf

We are not gonna make all of these folders and/ or files.
Folders
We're just gonna make 4 folders
sudo mkdir /etc/nginx/conf.d
sudo mkdir /etc/nginx/sites-available
sudo mkdir /etc/nginx/sites-enabled
sudo mkdir /etc/nginx/snippets
Files
Now we need to make:
- default.conf in conf.d folder
- Multiple files in snippets folder

Some Explaining:

Now to explain some things first and hopefully clear some confusion before we begin.

I configure all my websites and/ or services in default.conf. (Easier overview of everything you have running)
Then i use Reverse Proxy if i want to offer websites and/ or services to the outside world. (-> http://ip:port)

So default.conf to host all my websites and/ or services Internally/ Local/ LAN.
And ReverseProxy.conf to host my websites and/ or services Externally/ Web/ WAN.

Tips for default.conf:

Don't use your domain and /or External DNS as server_name. Example: nginx.domain.ltd
1. It's confusing
2. This is a local site !
When going to the adress from another machine, it tries to resolve it on the internet.

Just use http://ip:port or http://servername:port and save yourself the headache.
Default.conf
Let's Start with making a default.conf
sudo nano /etc/nginx/conf.d/default.confAnd paste the following in:
# 49200 - Nginx Web Root

server {
    	listen      				    49200;
    	listen      				    [::]:49200;
    	server_name 				    nginx;
	    set                     		$base /usr/share/nginx/html;
    	root                    		$base;

	# Additional Config
    	include 					    snippets/general.conf;

	# Logging
    	access_log              		/var/log/nginx/nginx.access.log combined buffer=512k flush=1m;
    	error_log               		/var/log/nginx/nginx.error.log warn;

	# Index
    	index                   		index.html index.htm;

    	# index.php fallback
    	location / {
        try_files $uri $uri/ 			/index.php?$query_string;
    	}

    	# handle .php
    	location ~ \.php$ {
        fastcgi_pass 				    unix:/run/php-fpm7/php-fpm.sock;
        include      				    snippets/php_fastcgi.conf;
    	}
}
Right, what did i just copy and paste ?
# 49200 - Nginx Web Root    (This is just a comment for easy reference)

server {
    	listen      				    49200;   (The HTTP port nginx listens on for this website)
    	listen      				    [::]:49200;   (The HTTPS port nginx listens on for this website)
    	server_name 				    nginx;    (The name this website has local/ internal/ LAN for you)
	    set                     		$base /usr/share/nginx/html; (Website folder. Set it to the root of the website.)
    	root                    		$base;  (Root folder of the website. Can set /subfolder here, if one.)

	# Additional Config
    	include 					    snippets/general.conf;  (Contains general settings to include)

	# Logging
    	access_log              		/var/log/nginx/nginx.access.log combined buffer=512k flush=1m; (Acces Log. Rename)
    	error_log               		/var/log/nginx/nginx.error.log warn; (Error Log. Rename)

	# Index
    	index                   		index.html index.htm; (The files the website uses to show on start)

    	# index.php fallback  (This is standard for php websites)
    	location / {
        try_files $uri $uri/ 			/index.php?$query_string;
    	}

    	# handle .php   (This is also standard for php websites)
    	location ~ \.php$ {
        fastcgi_pass 				    unix:/run/php-fpm7/php-fpm.sock; (Run website on PHP7. Change fpm7 to fpm for PHP8)
        include      				    snippets/php_fastcgi.conf;  (include configuration for FPM)
    	}
}
What the above does is host the Nginx Welcome page on http://localhost:49200 or from another machine http://SrvIp:49200. Running sudo nginx -t (test config) will give an error because we are including snippets that we have not made yet.
Snippets
What are snippets ?
Snippets are nothing more than conf files that you can include.

Why use snippets ?
1. Central management of your settings
2. Include, instead of copying the same chunks of code to every site. Looks much cleaner.

The snippets we are gonna make are:
- acme.conf
- general.conf
- php_fastcgi.conf
- proxy.conf
- security.conf
- Optional: wordpress.conf
acme.conf
This config contains the location of the letsencrypt (ACME) folder we made earlier. This is for SSL.

acme.conf
sudo nano /etc/nginx/snippets/acme.confPaste in the following
# ACME-challenge
location ^~ /.well-known/acme-challenge/ {
    root var/lib/letsencrypt;
}
If you create your letsencrypt folder somewhere else, change it here. general.conf This config contains favicon.ico, robots.txt and gzip settings general.conf
sudo nano /etc/nginx/snippets/general.confPaste in the following
# favicon.ico
location = /favicon.ico {
    log_not_found off;
    access_log    off;
}

# robots.txt
location = /robots.txt {
    log_not_found off;
    access_log    off;
}

# gzip
gzip            on;
gzip_vary       on;
gzip_proxied    any;
gzip_comp_level 6;
gzip_types      text/plain text/css text/xml application/json application/javascript application/rss+xml application/atom+xml image/svg+xml;
php_fastcgi.conf
This config contains php-fpm settings.

php_fastcgi.conf
sudo nano /etc/nginx/snippets/php_fastcgi.confPaste in the following
# 404
try_files                     $fastcgi_script_name =404;

# default fastcgi_params
include                       fastcgi_params;

# fastcgi settings
fastcgi_index                 index.php;
fastcgi_buffers               8 16k;
fastcgi_buffer_size           32k;

# fastcgi params
fastcgi_param DOCUMENT_ROOT   $realpath_root;
fastcgi_param SCRIPT_FILENAME $realpath_root$fastcgi_script_name;
fastcgi_param PHP_ADMIN_VALUE "open_basedir=$base/:/usr/lib/php/:/tmp/";
proxy.conf
This config contains the proxy settings like headers.
I had to changed some things in here to get all to work.

proxy.conf
sudo nano /etc/nginx/snippets/proxy.confPaste in the following
proxy_http_version                 1.1;
proxy_cache_bypass                 $http_upgrade;

# Proxy headers
proxy_set_header Upgrade           $http_upgrade;
proxy_set_header Connection        $connection_upgrade;
proxy_set_header Host              $host;
proxy_set_header X-Real-IP         $remote_addr;
proxy_set_header X-Forwarded-For   $proxy_add_x_forwarded_for;
proxy_set_header X-Forwarded-Proto $scheme;
proxy_set_header X-Forwarded-Host  $host;
proxy_set_header X-Forwarded-Port  $server_port;
proxy_set_header X-SSL		       'on';

# Proxy timeouts
proxy_connect_timeout              60s;
proxy_send_timeout                 60s;
proxy_read_timeout                 60s;
security.conf
This config contains the security settings.
I had to change the content-security-policy for wordpress and such to work.

security.conf
sudo nano /etc/nginx/snippets/security.confPaste in the following
# security headers
add_header X-Frame-Options           "SAMEORIGIN";
add_header X-XSS-Protection          "1; mode=block" always;
add_header X-Content-Type-Options    "nosniff" always;
add_header Referrer-Policy           "no-referrer-when-downgrade" always;
add_header Content-Security-Policy   "default-src 'self' https: data: 'unsafe-inline' 'unsafe-eval';" always;
add_header Strict-Transport-Security "max-age=31536000; includeSubDomains" always;

# . files
location ~ /\.(?!well-known) {
    deny all;
}
Optional: wordpress.conf
This config is ONLY for wordpress site's, to thighten up the security (if you want to).

wordpress.conf
sudo nano /etc/nginx/snippets/wordpress.confPaste in the following
# WordPress: allow TinyMCE
location = /wp-includes/js/tinymce/wp-tinymce.php {
    include nginxconfig.io/php_fastcgi.conf;
}

# WordPress: deny wp-content, wp-includes php files
location ~* ^/(?:wp-content|wp-includes)/.*\.php$ {
    deny all;
}

# WordPress: deny wp-content/uploads nasty stuff
location ~* ^/wp-content/uploads/.*\.(?:s?html?|php|js|swf)$ {
    deny all;
}

# WordPress: SEO plugin
location ~* ^/wp-content/plugins/wordpress-seo(?:-premium)?/css/main-sitemap\.xsl$ {}

# WordPress: deny wp-content/plugins (except earlier rules)
location ~ ^/wp-content/plugins {
    deny all;
}

# WordPress: deny general stuff
location ~* ^/(?:xmlrpc\.php|wp-links-opml\.php|wp-config\.php|wp-config-sample\.php|readme\.html|license\.txt)$ {
    deny all;
}
Now you made all the snippets and setup the nginx welcome page on a different adress. Now to see if everything is allright
sudo nginx -tIf all the test are ok, reload nginx
sudo systemctl reload nginxNOW we should be able to visit the website on http://srvip:49200
Adding another website
When installing the LEMP(P) stack we also installed phpMyAdmin.

Let's add that to our current config.

default.conf
sudo nano /etc/nginx/conf.d/default.confAnd add the following
# 49201 - phpMyAdmin

server {
    	listen      			    49201;
    	listen      			    [::]:49201;
    	server_name 			    pma;
	set                     	    $base /usr/share/webapps/phpMyAdmin;
    	root                    	$base;

	# Additional Config
    	include 			        snippets/general.conf;

	# Logging
    	access_log              	/var/log/nginx/pma.access.log combined buffer=512k flush=1m;
    	error_log               	/var/log/nginx/pma.error.log warn;

   	# index.php
    	index                   	index.php;

    	# index.php fallback
    	location / {
        try_files $uri $uri/ 		/index.php?$query_string;
    	}

    	# handle .php
    	location ~ \.php$ {
        fastcgi_pass 			    unix:/run/php-fpm/php-fpm.sock;
        include      			    snippets/php_fastcgi.conf;
    }
}
Now test and reload nginx
sudo nginx -t && sudo systemctl reload nginxNow go to http://serverip:49201 to test if you get the phpMyAdmin page That's it. As you can see it's real easy to add a website and/ or service.
Reverse Proxy
How to setup a reverse proxy for you websites and/ or services.

Let's make a template that we can copy if we want to make an website and/ or service available to the outside.
sudo nano /etc/nginx/sites-available/reverseproxy.domain.ltd.confPaste in the following
# HTTP redirect

server {
		listen      				    80;
		listen      				    [::]:80;
		server_name 				    reverseproxy.domain.ltd;

		# ACME-Challenge
		include     				    snippets/acme.conf;

		# Redirect
		return 301 					    https://reverseproxy.domain.ltd$request_uri;
}


# HTTPS Reverse Proxy

server {
		listen                  		443 ssl http2;
		listen                  		[::]:443 ssl http2;
		server_name             		reverseproxy.domain.ltd;

		# Additional Config
		include					        snippets/general.conf;

		# SSL
		ssl_certificate         		/etc/letsencrypt/live/reverseproxy.domain.ltd/fullchain.pem;
		ssl_certificate_key     		/etc/letsencrypt/live/reverseproxy.domain.ltd/privkey.pem;
		ssl_trusted_certificate 		/etc/letsencrypt/live/reverseproxy.domain.ltd/chain.pem;

		# Security Headers
		include                 		snippets/security.conf;

		# Logging
		access_log              		/var/log/nginx/reverseproxy.domain.ltd.access.log combined buffer=512k flush=1m;
		error_log               		/var/log/nginx/reverseproxy.domain.ltd.error.log warn;

		# Reverse Proxy
		location ^~ / {
        	proxy_pass            		http://127.0.0.1:XXXXX;
        	include               		snippets/proxy.conf;
    }
}
This template is used for subdomains.
The proxy_pass set the adress and port to proxy to (127.0.0.1 if it runs on the same server as Nginx. Change XXXXX to the port used)
(Because you make your domain once, adding subdomains happens more)

For your main domain use
(This just has an extra server block to catch your www and non-www traffic)
# HTTP redirect

server {
		listen      				    80;
		listen      				    [::]:80;
		server_name 				    domain.ltd;

		# ACME-Challenge
		include     				    snippets/acme.conf;

		# Redirect
		return 301 					    https://domain.ltd$request_uri;
}

server {
        listen                          80;
        listen                          [::]:80;
        server_name                     www.domain.ltd;

        #ACME-Challenge
        include                         snippets/acme.conf;

        # Redirect
        return 301                      https://domain.ltd$request_uri;
}

# HTTPS Reverse Proxy

server {
		listen                  		443 ssl http2;
		listen                  		[::]:443 ssl http2;
		server_name             		domain.ltd;

		# Additional Config
		include					        snippets/general.conf;

		# SSL
		ssl_certificate         		/etc/letsencrypt/live/domain.ltd/fullchain.pem;
		ssl_certificate_key     		/etc/letsencrypt/live/domain.ltd/privkey.pem;
		ssl_trusted_certificate 		/etc/letsencrypt/live/domain.ltd/chain.pem;

		# Security Headers
		include                 		snippets/security.conf;

		# Logging
		access_log              		/var/log/nginx/domain.ltd.access.log combined buffer=512k flush=1m;
		error_log               		/var/log/nginx/domain.ltd.error.log warn;

		# Reverse Proxy
		location ^~ / {
        	proxy_pass            		http://127.0.0.1:XXXXX;
        	include               		snippets/proxy.conf;
    }
}
Just Extra: If you want to use http instead of reverse proxy, you can make a template for that to. Just in case. default.domain.ltd.conf
sudo nano /etc/nginx/sites-available/default.domain.ltd.confpaste in the following
# HTTP redirect

server {
    listen      			80;
    listen      			[::]:80;
    server_name 			domain.ltd;
    include     			snippets/acme.conf;

    location / {
    return 301 			    https://domain.ltd$request_uri;
    }
}

server {
    listen      			80;
    listen      			[::]:80;
    server_name 			www.domain.ltd;
    include     			snippets/acme.conf;

    location / {
    return 301 			    https://domain.ltd$request_uri;
    }
}


server {
    listen                  443 ssl http2;
    listen                  [::]:443 ssl http2;
    server_name             domain.ltd;
    set                     $base /srv/http/domain.ltd;
    root                    $base;

    # SSL
    ssl_certificate         /etc/letsencrypt/live/domain.ltd/fullchain.pem;
    ssl_certificate_key     /etc/letsencrypt/live/domain.ltd/privkey.pem;
    ssl_trusted_certificate /etc/letsencrypt/live/domain.ltd/chain.pem;

    # Security
    include                 snippets/security.conf;

    # Logging
    access_log              /var/log/nginx/domain.ltd.access.log combined buffer=512k flush=1m;
    error_log               /var/log/nginx/domain.ltd.error.log warn;

    # index.php
    index                   index.php;

    # index.php fallback
    location / {
        try_files $uri $uri/ /index.php?$query_string;
    }

    # additional config
    include snippets/general.conf;
    include snippets/wordpress.conf;

    # handle .php
    location ~ \.php$ {
    fastcgi_pass unix:/run/php-fpm7/php-fpm.sock;
    include      snippets/php_fastcgi.conf;
    }
}
This is for the main domain. To use it for a subdomain, remove one of the server blocks that listens on port 80.
Reverse proxy with SSL
Now to host a website to the outside world and get an ssl certificates for your site.

This is gonna show you how to get certificates for your Main Domain first.
Your main domain gets certificates for domain.ltd and www.domain.ltd.
Sub Domains get certificates for sub.domain.ltd only.

Make your domain.ltd.conf for your Main Domain.
Replace domain.ltd with your domain name.
sudo nano /etc/nginx/sites-available/domain.ltd.confPaste in the following
# HTTP redirect

server {
		listen      				    80;
		listen      				    [::]:80;
		server_name 				    domain.ltd;

		# ACME-Challenge
		include     				    snippets/acme.conf;

		# Redirect
		return 301 					    https://domain.ltd$request_uri;
}

server {
        listen                          80;
        listen                          [::]:80;
        server_name                     www.domain.ltd;

        #ACME-Challenge
        include                         snippets/acme.conf;

        # Redirect
        return 301                      https://domain.ltd$request_uri;
}

# HTTPS Reverse Proxy

server {
		listen                  		443 ssl http2;
		listen                  		[::]:443 ssl http2;
		server_name             		domain.ltd;

		# Additional Config
		include					        snippets/general.conf;

		# SSL
		ssl_certificate         		/etc/letsencrypt/live/domain.ltd/fullchain.pem;
		ssl_certificate_key     		/etc/letsencrypt/live/domain.ltd/privkey.pem;
		ssl_trusted_certificate 		/etc/letsencrypt/live/domain.ltd/chain.pem;

		# Security Headers
		include                 		snippets/security.conf;

		# Logging
		access_log              		/var/log/nginx/domain.ltd.access.log combined buffer=512k flush=1m;
		error_log               		/var/log/nginx/domain.ltd.error.log warn;

		# Reverse Proxy
		location ^~ / {
        	proxy_pass            		http://127.0.0.1:XXXXX;
        	include               		snippets/proxy.conf;
    }
}
BUT if we request certificates or test nginx now it fails... why ? Because 1. We have an HTTPS server blocks that says that we allready have certificates and it should listen on 443. 2. Everything should be redirected to HTTPS. But 1. You have to request certificates on port 80. To fix this you have to comment out the HTTPS references. First time registering domain behind proxy ? Comment out: - redirect, - listen ssl, - servername ssl, - ssl cert's Which will look like this
# HTTP redirect

server {
		listen      				    80;
		listen      				    [::]:80;
		server_name 				    domain.ltd;

		# ACME-Challenge
		include     				    snippets/acme.conf;

		# Redirect
#		return 301 					    https://domain.ltd$request_uri;
}

server {
        listen                          80;
        listen                          [::]:80;
        server_name                     www.domain.ltd;

        #ACME-Challenge
        include                         snippets/acme.conf;

        # Redirect
#        return 301                      https://domain.ltd$request_uri;
}

# HTTPS Reverse Proxy

server {
#		listen                  		443 ssl http2;
#		listen                  		[::]:443 ssl http2;
#		server_name             		domain.ltd;

		# Additional Config
		include					        snippets/general.conf;

		# SSL
#		ssl_certificate         		/etc/letsencrypt/live/domain.ltd/fullchain.pem;
#		ssl_certificate_key     		/etc/letsencrypt/live/domain.ltd/privkey.pem;
#		ssl_trusted_certificate 		/etc/letsencrypt/live/domain.ltd/chain.pem;

		# Security Headers
		include                 		snippets/security.conf;

		# Logging
		access_log              		/var/log/nginx/domain.ltd.access.log combined buffer=512k flush=1m;
		error_log               		/var/log/nginx/domain.ltd.error.log warn;

		# Reverse Proxy
		location ^~ / {
        	proxy_pass            		http://127.0.0.1:XXXXX;
        	include               		snippets/proxy.conf;
    }
}
Now the domain just listens on port 80. But the domain is still not available, what's up ? Site's you want to make available to the outside world need to be in sites-available and need to be linked to sites-enabled. This is because nginx.conf includes the conf.d/ and sites-enabled/ folders to load websites from. So every site you want to publish you have to link from sites-available to sites-enabled to have it show up.
sudo ln -s /etc/nginx/sites-available/domain.ltd.conf /etc/nginx/sites-enabled/Now to see if everything is ready to run
sudo nginx -t && sudo systemctl reload nginxIf the test passes ok and nginx reloaded, we can request a certificate for your Main Domain. Keep in mind that if you just added your domain and/ or subdomain record in your DNS, it can take up to 24hrs before the domain is available on the internet. Let's Encrypt needs to be able to find and acces your domain over the internet. Run the following to request a certificate for your Main Domain
sudo certbot certonly --nginxChoose the domain you want to request a certificate for (all) and see that it gives you a succesful message. Now remove all the comments again for your domain
sudo nano /etc/nginx/sites-available/domain.ltd.confAnd remove the # comments.
# HTTP redirect

server {
		listen      				    80;
		listen      				    [::]:80;
		server_name 				    domain.ltd;

		# ACME-Challenge
		include     				    snippets/acme.conf;

		# Redirect
		return 301 					    https://domain.ltd$request_uri;
}

server {
        listen                          80;
        listen                          [::]:80;
        server_name                     www.domain.ltd;

        #ACME-Challenge
        include                         snippets/acme.conf;

        # Redirect
        return 301                      https://domain.ltd$request_uri;
}

# HTTPS Reverse Proxy

server {
		listen                  		443 ssl http2;
		listen                  		[::]:443 ssl http2;
		server_name             		domain.ltd;

		# Additional Config
		include					        snippets/general.conf;

		# SSL
		ssl_certificate         		/etc/letsencrypt/live/domain.ltd/fullchain.pem;
		ssl_certificate_key     		/etc/letsencrypt/live/domain.ltd/privkey.pem;
		ssl_trusted_certificate 		/etc/letsencrypt/live/domain.ltd/chain.pem;

		# Security Headers
		include                 		snippets/security.conf;

		# Logging
		access_log              		/var/log/nginx/domain.ltd.access.log combined buffer=512k flush=1m;
		error_log               		/var/log/nginx/domain.ltd.error.log warn;

		# Reverse Proxy
		location ^~ / {
        	proxy_pass            		http://127.0.0.1:XXXXX;
        	include               		snippets/proxy.conf;
    }
}
Now test and reload Nginx
sudo nginx -t && sudo systemctl reload nginxIf this tests OK, then you should be able to reach you website on the domain name. domain.ltd or www.domain.ltd. All http traffic will be redirected to https and www redirected to non-www.
Reverse Proxy Sub Domain
Now we have our main domain how to add a subdomain ?
We made a template for that.

Copy the template and rename to your sub domain.
sudo cp /etc/nginx/sites-available/reverseproxy.domain.ltd.conf /etc/nginx/sites-available/sub.domain.ltd.confFirst time registering domain behind proxy ? Comment out - redirect, - listen ssl, - servername ssl, - ssl cert's Let's do that Open your sub domain conf
sudo nano /etc/nginx/sites-available/sub.domain.ltd.confAnd comment out
# HTTP redirect

server {
		listen      				    80;
		listen      				    [::]:80;
		server_name 				    sub.domain.ltd;

		# ACME-Challenge
		include     				    snippets/acme.conf;

		# Redirect
#		return 301 					    https://sub.domain.ltd$request_uri;
}


# HTTPS Reverse Proxy

server {
#		listen                  		443 ssl http2;
#		listen                  		[::]:443 ssl http2;
#		server_name             		sub.domain.ltd;

		# Additional Config
		include					        snippets/general.conf;

		# SSL
#		ssl_certificate         		/etc/letsencrypt/live/sub.domain.ltd/fullchain.pem;
#		ssl_certificate_key     		/etc/letsencrypt/live/sub.domain.ltd/privkey.pem;
#		ssl_trusted_certificate 		/etc/letsencrypt/live/sub.domain.ltd/chain.pem;

		# Security Headers
		include                 		snippets/security.conf;

		# Logging
		access_log              		/var/log/nginx/sub.domain.ltd.access.log combined buffer=512k flush=1m;
		error_log               		/var/log/nginx/sub.domain.ltd.nl.error.log warn;

		# Reverse Proxy
		location ^~ / {
        	proxy_pass            		http://127.0.0.1:XXXXX;
        	include               		snippets/proxy.conf;
    }
}
Now link the site to sites-enabled to publish it
sudo ln -s /etc/nginx/sites-available/sub.domain.ltd.conf /etc/nginx/sites-enabled/Now test nginx and reload it (sometimes your get the message that you have to reload your daemon to, let's do that to)
sudo nginx -t && sudo systemctl reload nginx && sudo systemctl daemon-reloadIf this is ok, request a certificate In the selection choose your sub.domain.ltd
sudo certbot certonly --nginxIf the request is succesfull uncomment your file again
sudo nano /etc/nginx/sites-available/sub.domain.ltd.confAnd uncomment
# HTTP redirect

server {
		listen      				    80;
		listen      				    [::]:80;
		server_name 				    sub.domain.ltd;

		# ACME-Challenge
		include     				    snippets/acme.conf;

		# Redirect
		return 301 					    https://sub.domain.ltd$request_uri;
}


# HTTPS Reverse Proxy

server {
		listen                  		443 ssl http2;
		listen                  		[::]:443 ssl http2;
		server_name             		sub.domain.ltd;

		# Additional Config
		include					        snippets/general.conf;

		# SSL
		ssl_certificate         		/etc/letsencrypt/live/sub.domain.ltd/fullchain.pem;
		ssl_certificate_key     		/etc/letsencrypt/live/sub.domain.ltd/privkey.pem;
		ssl_trusted_certificate 		/etc/letsencrypt/live/sub.domain.ltd/chain.pem;

		# Security Headers
		include                 		snippets/security.conf;

		# Logging
		access_log              		/var/log/nginx/sub.domain.ltd.access.log combined buffer=512k flush=1m;
		error_log               		/var/log/nginx/sub.domain.ltd.nl.error.log warn;

		# Reverse Proxy
		location ^~ / {
        	proxy_pass            		http://127.0.0.1:XXXXX;
        	include               		snippets/proxy.conf;
    }
}
Now test, reload and reload daemon and your sub domain should be available.
sudo nginx -t && sudo systemctl reload nginx && sudo systemctl daemon-reloadNow test by going to sub.domain.ltd. Like i said before if you just made a record for this sub in your DNS, it can take up to 24hrs for the domain to be available on the web. This also means that if the certificate request fails, it could be that your domain is not available through the internet yet.
Services
I see services as a package that hosts itself and allready has a port assigned.
Think bittorrent, Sonarr, Jellyfin.

You can have these services run on there own ports or change them to your range.

What i do is change them to the range of ports i'm using and write a comment in default.conf
sudo nano /etc/nginx/conf.d/default.confAdd comments so you know which ports are used and which services you have.
# 49200 - Nginx Web Root

server {
    	listen      				    49200;
    	listen      				    [::]:49200;
    	server_name 				    nginx;
	    set                     		$base /usr/share/nginx/html;
    	root                    		$base;

	# Additional Config
    	include 					    snippets/general.conf;

	# Logging
    	access_log              		/var/log/nginx/nginx.access.log combined buffer=512k flush=1m;
    	error_log               		/var/log/nginx/nginx.error.log warn;

	# Index
    	index                   		index.html index.htm;

    	# index.php fallback
    	location / {
        try_files $uri $uri/ 			/index.php?$query_string;
    	}

    	# handle .php
    	location ~ \.php$ {
        fastcgi_pass 				    unix:/run/php-fpm7/php-fpm.sock;
        include      				    snippets/php_fastcgi.conf;
    	}
}

# 49201 - phpMyAdmin

server {
    	listen      			    49201;
    	listen      			    [::]:49201;
    	server_name 			    pma;
	set                     	    $base /usr/share/webapps/phpMyAdmin;
    	root                    	$base;

	# Additional Config
    	include 			        snippets/general.conf;

	# Logging
    	access_log              	/var/log/nginx/pma.access.log combined buffer=512k flush=1m;
    	error_log               	/var/log/nginx/pma.error.log warn;

   	# index.php
    	index                   	index.php;

    	# index.php fallback
    	location / {
        try_files $uri $uri/ 		/index.php?$query_string;
    	}

    	# handle .php
    	location ~ \.php$ {
        fastcgi_pass 			    unix:/run/php-fpm7/php-fpm.sock;
        include      			    snippets/php_fastcgi.conf;
    }
}

# 49202 - Bittorrent

# 49203 - Sonarr

# 49204 - Jellyfin
This should wrap up everything around setting up Nginx. Last thing to setup is auto-renewal of certificates
Certificate Auto-Renewal
After getting certificates, check if the renewal service is not giving messages or anything, before enabling the timer
sudo systemctl status certbot-renew.serviceCheck the timer's status
sudo systemctl status certbot-renew.timerNow enable and start the timer
sudo systemctl enable --now certbot-renew.timerYou just have to enable the timer for the renewal to work. It checks 2 times a day. This finishes setting up Nginx. You now have: - nginx.conf -> setup - Folders -> setup - default.conf -> setup - Snippets -> setup - Reverse Proxy -> Setup - sites-available and enabled -> setup - SSL -> setup - SSL Auto-Renewal -> setup I hope this guide has helped you setting up nginx on a way that it's more understandable and easier to manage.